


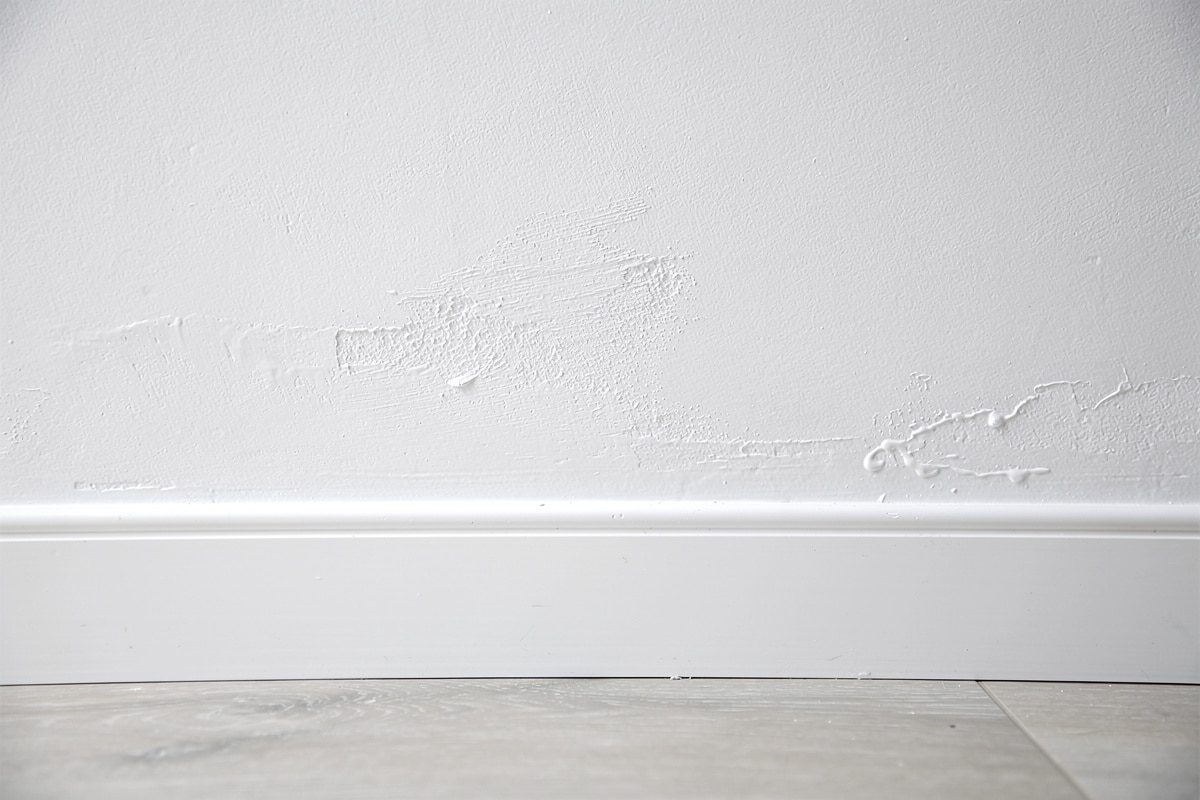
There is nothing quite like the promise of a fresh coat of paint in the spring. You crack open the can. You imagine the glossy finish. You picture a space that looks like it belongs in a design magazine.
Then the sun hits.
Suddenly, every bump, every seam, and every micro-scratch screams for attention. It feels like a visual nightmare. But it isn’t bad luck. It is physics.
Paint does not hide flaws. It reveals them.
If your wall looks amateurish despite your best efforts, the issue is rarely the color you chose. It is how the light interacts with the surface texture. Understanding this interaction is the only way to stop the frustration and get that clean, professional look.
How Lighting Angles Expose Surface Errors
Light is both your best friend and your worst enemy.
In late winter and early spring, the sun sits lower in the sky. This creates rasante light (grazing light). Instead of hitting the wall straight on, the rays skim across the surface. This angle casts tiny shadows from the slightest imperfection.
A dried paint droplet becomes a mountain. A smooth wall at noon can look catastrophic by late afternoon.
The human eye is wired to detect shadow variations. When you paint, you change how light reflects off the wall. If the surface isn’t flat, that reflection becomes distorted. The wall starts to look uneven, not because the paint is bad, but because the light is showing you the truth about the substrate.
Which Paint Finish Hides Flaws Best?
Your choice of sheen dictates how forgiving the finish will be.
Glossy or satin paints contain high levels of resin. They create a taut, mirror-like film. This finish does not forgive. It highlights every ripple, every brush stroke, and every tool mark. If your wall has any irregularities, a shiny finish will amplify them.
Matte paint absorbs light. It scatters it rather than reflecting it directly back. This “fluffs” the appearance of the wall, blurring minor defects. It is the go-to for older walls or ceilings where perfection is impossible.
Velvet (or eggshell) finishes have surged in popularity recently. They offer a middle ground. They are more washable than matte but still soft enough to hide surface texture better than satin.
For a DIYer trying to hide imperfect prep work, matte is safer. Satin is risky. Gloss is a challenge.
Why Dark Colors Amplify Texture
Many homeowners assume dark colors hide imperfections. This is a myth.
Deep shades like anthracite, petrol blue, or forest green create high contrast. Shadows become darker. Highlights become brighter. The result is a wall that looks textured and uneven, even if it is smooth to the touch.
On a dark wall, a single speck of dust or an aggressive sanding mark is instantly visible.
Light colors like off-white or beige diffuse light more uniformly. They soften the visual impact of waves or ridges in the plaster. If you are struggling with a wall that is not perfectly flat, light tones will make it look smoother than dark ones ever could.
What the Wall Substrate Reveals
Paint cannot fix a moving wall.
Old walls have memory. If you painted over a crack without stabilizing it, the crack will return. The paint film stretches and breaks when the building shifts. This is why calicot (reinforcing tape) is non-negotiable over joints and cracks. Without it, you are just painting over a problem that will reappear once the paint dries.
Repaired patches also cause issues. New plaster reacts differently than old, cured plaster. If you spot-pruned an area without priming the patch, the new ender will suck up the paint differently. This creates a “ghost” effect. The patched area will look matte or dull compared to the surrounding wall, even if the texture is smooth.
This is called the effect of embossing or pumping. The porous patch absorbs the binder, leaving the pigment sitting on top. The finish looks uneven.
The Sanding Mistake That Ruins Walls
Sanding is the most tedious part of the job. It is also the most critical.
A relief of just a few microns is invisible under the harsh work light. But once colored and exposed to natural grazing light, that micron becomes a shadow line.
If the edges left by the taping knife are not sanded flat, they draw vertical lines down the wall. These lines look like artisanal flaws. They signal that the wall was not prepped by a professional.
If the joint compound was not pulled perfectly flat, you get a wavy effect. This gives the wall a wavy, undulating appearance. It is hard to fix without re-sanding and repainting.
How to Fix the Reveal
Stop painting over mistakes. Fix the surface first.
- Check the light: Use a bright work light held at a low angle to find bumps before you paint.
- Choose the right sheen: Use matte for imperfect walls. Use satin only if the prep is flawless.
- Prime patches: Always prime repaired spots to equalize porosity.
- Sand edges: Remove the ridges left by the taping knife until they are flush with the wall.
The wall will always show what lies beneath.
If you want a perfect finish, the work happens before the paint goes on.
The sun will find the flaws. It always does.
The hidden cost of skipping the prep work
You think you’re saving time by skipping the dusting? You’re just paying for it later. When you roll paint over a surface that hasn’t been scrubbed down with soda ash and rinsed clean, you aren’t painting. You’re sealing in the grime. That layer of dust from previous sanding mixes with your fresh coat. The result is a gritty texture that ruins the smooth finish you’re after.
Grease is worse. Fingerprints or kitchen splatter create micro-bubbles where the paint simply won’t stick. It leads to premature flaking. Don’t cut corners on the wash-down. A rigorous degrease is non-negotiable for a base that holds.
Skipping or misusing primer
People treat primer like a marketing upsell. It’s not. It’s a blocker. Its job is to seal the surface and equalize absorption. Skip it, and your wall will drink the topcoat unevenly. You end up with patchy areas that look like they need a third or fourth coat, never quite hitting that uniform look.
Using the wrong type is just as bad. If you have stains, you need isolation. Nicotine, old water marks, and soot bleed through standard water-based paints. They come back hours after drying, yellowing your new color from the inside out. You need a specific stain-blocking primer to kill those ghosts. Without it, you’re just painting over a problem that will break through again.
Tool errors that create visible defects
The trick to painting isn’t pressure. It’s consistency. If you press too hard on the roller to “wring out” the paint, you get bare spots and heavy edges. Press too lightly with too much paint, and you get orange peel. That bumpy, granular texture is a nightmare to fix. Let the tool do the work. Deposit a consistent layer and move on.
The “fresh-on-fresh” rule
Here is where most DIYers fail: stopping mid-wall. You must paint “wet-on-wet.” If you touch a zone that has started to set, you drag the pigments. It creates a visible seam. Work in sections about one square meter at a time. Never stop in the middle of a vertical run. Finish the entire bank of wall in one go to ensure the paint films fuse perfectly.
Environmental traps
Check the climate. If your radiators are on but windows are cracked for fresh air, the paint dries too fast. It doesn’t have time to level out. You’ll see the roller marks permanently etched into the finish. Aim for 15–20°C. No direct drafts while you’re applying.
Diagnosing your mistakes
If you see vertical parallel lines, it’s likely a poor quality roller or uneven distribution. Fluffy cloud-like patches usually mean residual moisture in the wall or a missing primer. Horizontal marks? You crossed your roller strokes during the finishing pass.
Uneven shine is often burnishing. This happens when you scrub a spot too much with the roller or a sponge. The resin rises to the surface and shines. It can also happen if the substrate sucked up the water or solvent too quickly, leaving pigments exposed and patchy.
Bubbling? Trapped air or moisture behind the film. Chalking (white powder on your hand)? The wall is too porous and is absorbing the binder. That’s not an application error anymore. It’s a structural issue with the substrate. You need a fundamental treatment, not just more paint.
Which primer stops nicotine stains?
Not all primers are created equal. For heavy contaminants like nicotine or smoke damage, you need a shellac-based or oil-based stain-blocking primer. Water-based primers often let these pigments bleed through eventually. Look for products explicitly labeled as “stain-blocking” or “anti-bleed.” Oil-based options provide the most reliable barrier for severe cases.
How to fix orange peel texture
If you already have that bumpy texture, you can’t just paint over it. The surface needs to be sanded smooth before reapplying paint. Use a fine-grit sandpaper (220-grit or higher) to knock down the peaks. Wipe away all dust thoroughly. Then apply a fresh coat with less pressure, ensuring a consistent load on the roller. Prevention is easier than correction here.
Where do I start if my wall is peeling?
Start with the source. Peeling is rarely just a paint issue. Tap the area. If it sounds hollow, moisture is involved. Scrape back to solid substrate. Identify and fix any leaks or humidity sources first. Once the wall is dry and clean, apply a masonry primer designed for the specific substrate (drywall, plaster, or wood) before repainting. Ignoring the root cause will just repeat the cycle.
Fixing flaws without stripping: where to sand and what grit to use
You don’t need to strip everything down to the bare plaster if you have a drip or a thick ridge. Just use a fine grit paper, 180 or 240, to level the area. Move in wide circles. This melts the defect into the surrounding wall. The goal is to avoid digging into the substrate. A depression shows up worse than a bump once you apply the new coat. If you carve out too much, you create a shadow line. Sand gently. Blend, don’t carve.
How to apply a clean pass without visible seams
If traces remain, a third coat can save the day. Dilute it slightly. For acrylic paint, add about 5% water. This creates a smoothing coat. It unifies the finish. Apply it quickly and lightly. Cover the entire wall. Do not stop in the middle. Overlapping wet-on-wet prevents texture disparities between the center and corners. You want a uniform sheen, not a patchwork of gloss levels. Rush the application. Keep the layer thin.
When to use a finishing mesh or leveling compound
Sometimes the wall is too damaged for paint alone. A full application of leveling compound is the only real fix for a zero-defect look. If the surface is fatigued or has micro-cracks, consider a glass fiber mesh or renovation cloth. It offers a flexible, homogeneous base. It masks past scars permanently. This is the pro move for unstable surfaces. You lose some time but gain durability and a smooth canvas that accepts paint evenly.
Prep work: repair, level, and seal porosity
Eighty percent of a successful paint job happens before you open the can. Follow the triptych: repair holes, level imperfections, and seal porosity. Use a patching compound for holes. Use a high-quality leveling compound for surface flaws. Then, apply an isolating primer. This healthy base ensures the topcoat stays on the surface. It prevents absorption issues and reveals the paint’s true color and depth. Skipping the primer is a mistake you’ll see in six months.
Choosing the right sheen for your room and lighting
Check the light before you buy. A living room with large windows and crossing light? Go with matte or velvet. Satin fits kitchens or hallways better. Those areas need stain resistance and often have artificial or indirect light. Don’t cheap out on tools. A roller with 10-12mm fibers is standard for smooth walls. Cheap rollers shed hairs. They create unwanted texture. Use good gear for a clean result.
Final inspection checklist before packing up
Don’t think you’re done just because the wall looks dry. Grab a work light or a powerful flashlight. Place it against the wall to create raking light. This harsh angle reveals every flaw before the paint cures completely. Check these points:
- No brush hairs trapped in the film.
- Consistent sheen across the whole surface.
- Crisp lines at ceilings and skirting boards.
- No gaps in internal corners.
Taking the time to refine each step transforms a refresh into a renovation. Painting should feel like a win, not a visual stress test. March is coming. The light will be right. Inspect your walls. Give them the finish they deserve. Or don’t. The drips will always be there if you ignore them.


