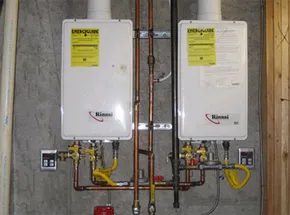
Your gas water heater has a tiny flame hiding inside it. It’s called the pilot light. This flame is the heartbeat of the unit. It waits there, ready to ignite the main burner the second the tank temperature drops below your thermostat setting. But there is a small metallic tube sitting right next to that flame. You might not know its name. It is the thermocouple.
If your pilot light keeps dying, the thermocouple is often the culprit.
This device is primarily a safety feature. It monitors the pilot light status. If the flame goes out, the thermocouple sends a signal that shuts the gas valve. It keeps the gas off until it senses heat again. If this part fails, the valve closes permanently. No heat. No hot water.
Here is how the science works. And how you can test it yourself.
How a Thermocouple Works
A thermocouple is simple. Ingenious, but simple. It uses two different metal wires joined at one end. When you heat that junction, something called the Seebeck effect happens. It generates a tiny voltage. The more heat at the junction, the more voltage.
The amount of voltage produced depends on the temperature difference between the heated end and the cool ends. By measuring that voltage, you determine the temperature.
It is durable. It responds quickly. That is why it is used in everything from industrial furnaces to your home oven. It handles extreme temperatures better than most sensors. But it is not perfect.
The Hot and Cold Junctions Explained
The two metal wires are fused at one point. This is the hot junction. This is the part sitting in the pilot flame. This is where the temperature measurement happens.
When the junction gets hot or cold, a thermoelectric effect occurs. The electron density differs between the two dissimilar metals. This creates the voltage.
The other ends of the wires are separate. They form the cold junction. Also known as the reference junction. The name is misleading. It does not need to be cold. It just needs to be the end where the wires connect to your measurement device.
The cold junction acts as a reference point. It allows you to calculate the true temperature at the hot junction. You need to know the ambient temperature at this cold end. Usually, it is stable. Or it is measured. Without this reference, the voltage reading means nothing. The system relies on that difference in temperature between the two ends to function.
Where Thermocouples Are Used
Thermocouples are everywhere. Their robustness makes them ideal for harsh environments.
Industrial Settings
Factories use them constantly. Furnaces. Kilns. Reactors. They monitor and control temperatures in high-stakes environments. Safety and efficiency depend on their reliability.
Household Appliances
Your oven has one. Your gas water heater has one. They regulate temperature. They ensure safety. They respond to changes instantly. This makes them perfect for maintaining consistent heat in everyday devices.
Scientific Research
Researchers need precision. They use thermocouple probes for experiments. They measure across temperature gradients. From basic lab work to advanced studies, they are indispensable.
Automotive Industry
Cars use them too. They measure exhaust gas temperatures. They monitor engine performance. This data optimizes efficiency. It reduces emissions. Better engine management leads to better vehicle performance.
The Advantages
The biggest advantage is range. Thermocouples measure a wide spectrum of temperature differences. They work in extreme cold. They work in intense heat.
Durability is key. Industrial and automotive contexts are harsh. High temperatures. Vibration. Impact. These sensors survive it all. Their simplicity makes them easy to install and replace.
The Limitations
They are not flawless. Accuracy is a weak point. They are less precise than other temperature sensors.
The output is non-linear. The relationship between temperature and voltage is not straightforward. You cannot just read a linear scale. This non-linearity requires calibration. It needs complex electronic systems for precise measurement. In some applications, this is a major drawback.
Testing Your Thermocouple
If your pilot light won’t stay lit, you need to test the thermocouple. You do not need a degree in physics. You need a multimeter. And a wrench.
- Turn off the gas. Safety first. Shut off the gas supply to the water heater.
- Access the valve. Remove the access panel. Locate the gas control valve. The thermocouple is a thin copper tube running into the side of the valve.
- Disconnect the tube. Use an adjustable wrench to loosen the nut connecting the thermocouple to the valve. Pull it free.
- Measure the voltage. Set your multimeter to millivolts (mV). Touch the probes to the thermocouple’s tip and the other end.
- Light the pilot. With the thermocouple still disconnected, light the pilot. Hold it there for a minute.
- Check the reading. A good thermocouple generates about 25 to 30 millivolts. If it reads less than 10 mV, replace it.
A weak thermocouple cannot hold the gas valve open. The safety mechanism trips. The flame dies. The cycle repeats.
Replacing it is cheap. The part costs a few dollars. The labor is free if you do it yourself. But the science behind it matters. Understanding the Seebeck effect helps you trust the process. It is not magic. It is physics. And physics is fixed.
The pilot light flickers. The metal heats up. The voltage rises. The valve stays open. Water heats. You shower. It works.
Until the next time the cold junction reference drifts. Or the wire corrodes. Then you start again. With a wrench. And a new part.
How a Water Heater Thermocouple Actually Works
It’s easy to get lost in the jargon of exposed junctions and extension wires. But at its core, this is just a simple sensor. Specifically, a thermocouple in a gas water heater. You probably don’t think about it until the pilot light dies. Then you’re holding a cheap metal rod and wondering why your hot water is cold.
The thermocouple is a probe made of two different metals fused together. It sits right in the pilot light flame. When that flame touches the tip, the dissimilar metals generate a tiny electrical current. This isn’t magic. It’s physics. The heat creates voltage.
That small current travels up the wire to the gas valve. It acts as an electromagnet. The magnetic field holds open the gas solenoid. Keep the flame lit, keep the valve open. Simple loop.
Why Your Pilot Light Keeps Going Out
If the pilot light flickers and goes out, the heat source disappears. The thermocouple cools down. The electrical current stops. Without that current, the gas valve snaps shut. It cuts off the fuel.
This is a safety feature. Not an inconvenience. A malfunctioning valve could leak gas into your home. That leads to explosions. Or fires. The thermocouple prevents this by ensuring gas only flows when there is an active flame to burn it. If there’s no flame, there should be no gas.
Testing Your Thermocouple Like a Pro
You don’t need a PhD to diagnose this. You need a match and a bit of patience.
Light the pilot. Press and hold the reset button on the gas control valve. Keep it pressed for 30 to 60 seconds. This allows the thermocouple to heat up and generate enough current to hold the valve.
Now, let go.
Watch the pilot. If the flame stays lit, your thermocouple is fine. The problem might be elsewhere. If the pilot dies immediately or within a minute, the thermocouple is likely dead. Or it’s misaligned. Make sure the tip is squarely in the hottest part of the flame. Not beside it. In it.
If you tried this and the pilot wouldn’t light at all, check the gas supply first. A clogged valve or empty tank isn’t a thermocouple issue. But if the gas is flowing and the light won’t hold, replace the rod. They cost about fifteen dollars. And you don’t need special tools. Just a wrench.
Is It Worth Fixing Yourself?
A thermocouple is one of the few gas appliance parts you can swap without calling a pro. It’s passive. No electronics. No code compliance issues like with a control board. It’s just a metal tube.
The cost of a technician visit is usually fifty dollars or more. The part itself is negligible. If you’re handy with a wrench, do it. If you’re scared of gas lines, stop here. Call someone.
The beauty of this design is its simplicity. No batteries. No sensors to update. Just heat and voltage. It works until it doesn’t. And when it fails, it fails safely.
Keep an extra one in your junk drawer. You’ll thank yourself when the winter hits and the hot water stops.