Have you ever stood in a nursery, staring at a majestic lemon tree tagged with a price that makes your wallet flinch? You aren’t alone. We’ve all envied those potted citrus gems lining the aisles, their fruit promising a taste of the Mediterranean. But here is the secret the pros keep quiet about: you don’t need to spend a fortune to get a lush citrus orchard on your balcony. The solution is likely sitting in your neighbor’s pruning pile or lying on the ground under your own tree.
February offers a unique window. It’s not summer. It’s not spring. It’s the dead of winter, technically, but biologically, something is shifting. This is the perfect time for frugal gardeners to turn pruning waste into future trees. It’s not magic. It’s horticulture.
Why Late Winter is the Best Time to Multiply Citrus
You might think propagation happens when everything is blooming. It doesn’t. The magic happens now. In late February, as the air starts to soften, the sap begins to move. This “rising of the sap” wakes up the plant’s internal systems without triggering a full-blown growth spurt.
When you take a cutting during this specific window, you are tapping into a surge of natural hormones called auxins. These hormones are primed to build roots, not leaves. If you wait until the heat of summer hits, the plant focuses on survival and foliage. By cutting now, you give the stem a head start. The roots establish themselves in the cool soil while the plant remains dormant above ground. By the time the sun gets strong, your cutting has a solid foundation to handle the stress.
Stop Throwing Away Pruning Waste
Most people cut back their lemon trees in late winter to shape them and let air circulate through the center. Then, those branches go into the compost or the trash bin. That is a missed opportunity. Those branches are not garbage. They are clones of your best-producing tree.
By rooting these cuttings, you aren’t just saving money. You are replicating a tree you already know works. You get the same fruit quality, the same resistance to local pests, and the same growth habit. Buying a nursery tree is a gamble on genetic health. Growing from a cutting guarantees you know exactly what you are getting. It’s free. It’s sustainable. And it’s surprisingly effective if you get the details right.
Selecting the Perfect Semi-Hardwood Cutting
Success hinges on one thing: the branch you choose. Pick the wrong wood, and the cutting will rot or dry out before it ever thinks about growing roots.
You need to find semi-hardwood cuttings. This is a specific stage of growth that is easy to miss if you aren’t looking closely.
- Too green: If the stem is bright green and flexible like a willow whip, it holds too much water. It will likely rot before it can form roots.
- Too brown: If the stem is hard, brittle, and dark brown like an old twig, it’s too mature. The cells are too set to regenerate tissue quickly.
- Just right: You want a stem that is firm at the base but still slightly pliable at the tip. It should have a light tan or beige color near the bottom, transitioning to a soft green at the very end. This wood has enough stored energy to survive, but it’s young enough to activate growth hormones.
It’s a visual judgment call. If you can snap it cleanly with a slight fibrous pull, you’re in the zone.
Gathering the Right Tools for Clean Cuts
Gardening doesn’t require expensive gear, but it does demand hygiene. A dirty tool kills a cutting faster than a cold snap.
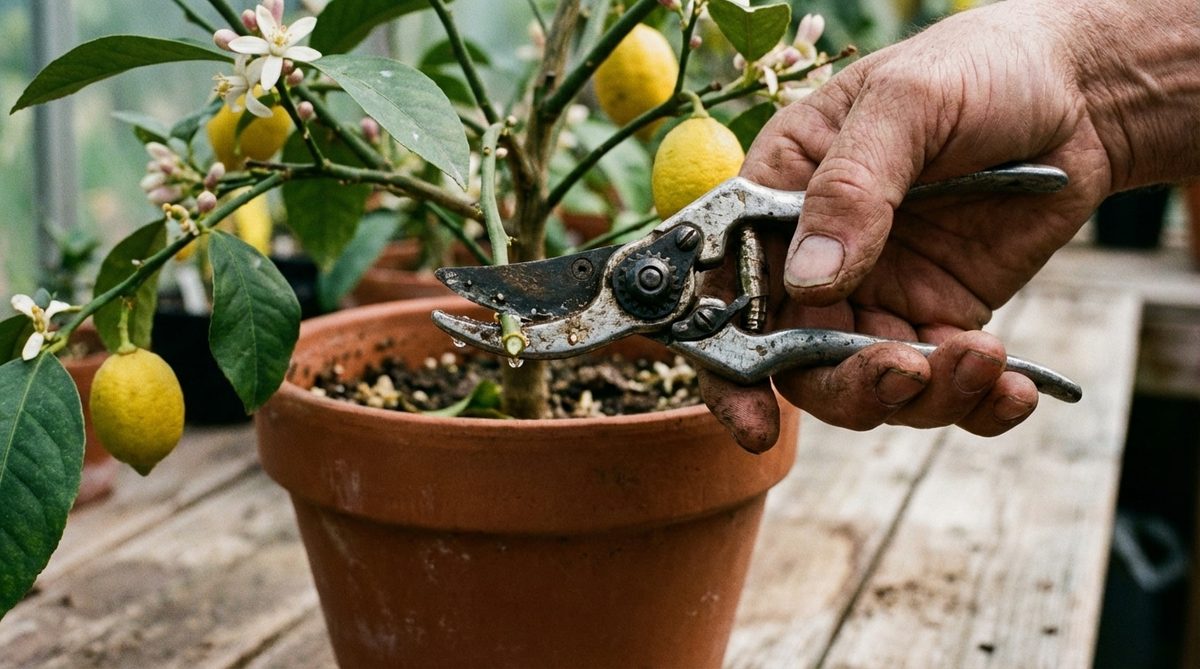
You need a pair of bypass pruners or a sharp knife. They must be razor-sharp. Dull tools crush the plant tissue, creating a wound that invites disease rather than healing cleanly. Before you make your first cut, wipe the blade with isopropyl alcohol. This simple step prevents you from passing viruses or bacteria from one branch to another.
For the soil, skip the heavy garden dirt. It compacts and suffocates roots. You need something airy. Mix equal parts of a high-quality seed-starting potting mix and coarse sand or perlite. This blend drains water quickly while holding just enough moisture.
You’ll also need small pots with drainage holes. Some gardeners use rooting hormone to speed up the process. It helps, especially with difficult species. For lemon trees, it’s optional. If your technique is clean and the wood is right, they often root on their own merit. But having a small jar of hormone on hand costs pennies and removes doubt.
The First Critical Steps
Once you’ve identified a semi-hardwood branch about 6 to 8 inches long, make your cut.
- Cut just below a node. Nodes are the bumps on the stem where leaves emerge. Roots grow from these points.
- Remove the lower leaves. Strip off any leaves from the bottom half of the stem. You don’t want them rotting in the soil.
- Trim remaining leaves. If the top leaves are large, cut them in half horizontally. This reduces water loss through transpiration while the cutting has no roots to drink water.
- Insert the cutting. Push the bare end of the stem into your moist soil mix. Make sure at least one or two nodes are buried.
- Moisten and cover. Water the soil gently. If you have a clear plastic bag, loosely cover the pot to create a mini-greenhouse. This traps humidity, which is critical for leaves that can’t drink from the ground yet.
Place the pot in a bright spot, but out of direct sunlight. Direct sun will cook the cutting inside the bag. Indirect light keeps the plant calm. Wait. It will take weeks, maybe months, for roots to form. Do not pull on the cutting to check. You’ll break the tiny root hairs that have just started to emerge.
This is where patience separates the hobbyists from the gardeners. The tree you root now will smell like sunshine in your home within a year. But first, you have to trust the process. And you have to let go of the need for instant results.
The angled cut and strategic defoliation that concentrates energy
Once you have a branch that is roughly 15 centimeters long, precision matters. The bottom end needs a clean, angled cut—specifically a bevel. Make it right below a node, which is just that swollen bump where a leaf used to attach. This is not arbitrary. The hormone concentration for root growth is highest there. An oblique cut also gives you more surface area to press against the soil, helping the cutting drink faster.
Then comes the hard part. You have to strip the lower leaves off entirely. Leave only two or three at the top. Here is the pro trick though. Cut those remaining leaves in half with sharp scissors. Why? It sounds destructive. It is not. It limits water loss through evaporation without stopping photosynthesis completely. The cutting has no roots yet. It cannot pump water. It has to hoard every drop it has.
Creating a mini-greenhouse with a plastic bottle
This is the secret. Confinement. Humidity. You are essentially building a tiny, sealed ecosystem around that twig. After dipping the beveled end in rooting hormone (optional but helpful), plant it in moist substrate. Then trap it.
A clear plastic bottle cut in half works perfectly. Place it over the pot like a dome. Or just slip the entire pot into a clear plastic bag and seal it with a rubber band. You are aiming for near 100% humidity. This prevents the stem from drying out before roots have time to form. The difference between a successful propagation and a dry, dead stick often comes down to this single step.
Light and temperature: where to place your cuttings
The location of these mini-greenhouses dictates survival. Cuttings need light to wake up. They hate direct sun. Direct sun hitting a sealed plastic bottle turns it into an oven. Temperatures can spike to lethal levels in minutes. Find a spot near a north-facing window. Or use a sheer curtain to diffuse the light.
Keep the temperature steady, around 20 to 22 degrees Celsius. Heated homes in winter usually hit this mark. Just keep the pots away from radiators. Radiators dry out the air. You want that moisture trapped inside. If you see condensation on the plastic walls, that is good. It means the water cycle is closed. Open the lid or bag for a few minutes every couple of days to swap the air. Prevent mold. Keep it fresh.
How to tell if your cutting has survived
Patience. It is the hardest virtue. Do not tug on the stem every morning to see if it is rooted. You will just rip it out. Wait. In four to eight weeks, watch for new, pale green buds. They will appear at the leaf axils. That is the sign. The sap is moving. Roots are feeding the plant.
If the stem stays green and offers slight resistance when you give it a gentle tug after two months, you have succeeded. If it turns black or shrivels up, it failed. But with the humidity seal and clean tools, failure is rare.
Hardening off before the spring heat
When spring arrives and the roots are established, do not make the mistake of removing the plastic cover abruptly. The plant has lived in 100% humidity. Exposed to normal indoor or outdoor air, it will wilt instantly. Acclimatize it slowly. Remove the cover for an hour the first day. Two hours the next. Stretch it out over a week. Let the leaf cuticles toughen up to the real world.
Wait until the frost risk is gone. In many places, that means waiting until mid-May, after the “Ice Saints.” Even then, keep the young citrus tree in partial shade for its first year. Full sun will shock it.
Building a free, lush veranda
By following these steps in February, you will have vigorous plants months later. These are not store-bought saplings shipped in plastic from halfway across the world. They are yours. Adapted. Born right here. You can repot them into larger containers with citrus-specific soil once summer arrives.
This works for orange trees, mandarin kumquats, and other citrus varieties too. It is a way to multiply your collection. To trade with neighbors. To green your space without a carbon footprint.
Gardening does not require expensive equipment. It requires timing. Observation. Turning a twig destined for the compost bin into a future fruit-bearing tree is a small act. But it is durable. And it rewards the wait. You are left with something alive. Something that grows.